


Microsoft's latest operating system is much better than its predecessor, but there are still some annoying errors. We help you to solve them. Microsoft Windows 10 did a lot of things to solve problems that were typical of older versions of Windows - especially Windows 8. But it's still far from the perfect operating system and has its own troubles. Reviewing various user discussions (and their own experiences) we identified six problems that many people complain about: forced Windows 10 updates; digital assistant Cortana (which some users want to solve but can not); lost disk space; slow boot time; boring notifications; and problems with the Start menu.
But do not worry - help is on the road. We've explored ways to take care of these problems (or at least minimize them).
Keep in mind that we updated this story for version 1803. If you have not moved to that version of Windows 10, things might look or work a little differently.
1. Avoid forced updates for Windows 10
We'll start with the greatest pain: a Forced update. For many people, this is the biggest of all Windows headaches. Unlike earlier versions of Windows, Windows 10 does not allow you to choose which updates to install. Now that Microsoft issues an update, your machine installs it. End of story.
Well almost. Windows Update gives you some control over when the updates will be installed so that they do not interrupt your work. Windows 10 Professional, Enterprise and Education users may postpone updates.
There are also several solutions that allow anyone, even users of the Windows 10 Home Edition, to terminate the update process. One note, however: As a general rule, it is good that Windows 10 is kept up to date, as many updates do not solely fix errors or add new features, but also include security patches.
However, it is your machine, your operating system, and your life. So, if you want to interrupt compulsory Windows 10 updates, here are two ways to do this. I'll also show you how you can uninstall an already installed update and keep it uninstalled.
Use the link measurement function
The Windows 10 Connection Measurement feature is designed to save you money if you pay for bandwidth use over a certain amount, but you can use it as a cunning solution to avoid automatic updates. By default, this feature is off for Wi-Fi and Ethernet connections but is enabled for cellular connections. Here's how to turn it on for Wi-Fi and Ethernet connections.
For Wi-Fi:
- Go to Settings> Network & Internet> Wi-Fi.
- Press "Manage known networks."
- Press each Wi-Fi network with which you are connecting, and then click Properties.
- On the screen that appears, move the content to the "Metered connection" area and slide the slider to On.
For Ethernet connections:
- Go to Settings> Network & Internet> Status.
- Click "Change connection properties."
- On the screen that appears, move the content to the "Metered connection" area and slide the slider to On.
From now on, Windows 10 will not automatically download or install updates, although at least one person has logged in to AskWoody's colleagues my colleague Woody Leonhard that some updates are still installed. You must follow the above instructions for each Wi-Fi and Ethernet network with which you are connecting to interrupt the updates.
Turn off Windows Update
Windows Update works like any other Windows service - which means you can turn it off:
- Go to Control Panel> System and Security> Administrative Tools. It transfers you to a folder in Windows Explorer with a list of administrative tools, one of which is Services.
- Press twice Services.
- On the right side of the screen that appears, move the content to Windows Update and press it twice.
- In the Startup Type that opens then, select Disabled, and then press OK.
- Restart your PC.
Windows Update will no longer work, and you will not automatically download and install updates. If you ask Windows 10 to check for updates after you turn off Windows Update, you will receive an error message. Keep in mind that if you use one of these solutions, you will block all Windows updates. You can not choose which ones to install and which ones do not. The exception is security updates. If you are concerned about security, the technique of measuring the connection is a bit safer because it misses important security updates that you will not get when you turn off Windows Update.
If you choose to disable Windows Update, at some point you should turn it back on to get the security patches you missed. And if you opt for a link measurement technique, you'll probably want to turn it off once to get updates or bug fixes. When you do this, you will download and install all updates, not just the ones you want.
Please note, however, that there is still a good reason to use these techniques to exclude automatic updates because if you stop the automatic installation, you can check reports on problematic updates. If no one complains, then let them install; If there are problems, you can wait until a patch appears.

Uninstall and hide problematic updates
If you find any update that hurts (or may harm) your computer, there is another workaround: Uninstall a bad update, then hide it from Windows 10 so that it does not install again automatically. In this way, when a bad update repair appears, you can install all of the updates, including the repair. Keep in mind that you will not be able to uninstall any updates and you will not be able to hide any updates that you uninstall. However, it's worth a try if you have a bad update.
You can see all the updates that you have installed if you go to Settings> Update & Security> Windows Update> View update history. A list will appear, divided into five sections: Feature Updates, Quality Updates, Driver Updates, Definition Updates, and Other Updates. The "Feature Updates" section shows the main half-year updates - for example, Windows Update 10 April 2018. But you will not see it in plain English. Instead, the firmware version number that Microsoft uses as a reference for updates, such as version 1803 for updating from April 2018.
The Quality Updates section lists advanced Windows fixes that fix bugs, improve security, and add fewer features. Driver Updates displays drivers that have been updated. Definition Updates displays all antivirus and anti-malware updates of Windows's built-in malware tool. Other Updates contains various other fixes, such as the Windows Malicious Software Removal Tool. Click on the update to get information about this update. In this way, you may be able to find which update is causing you problems.
If you want to uninstall function updates (such as Windows 10, version 1803), you will have to do this within 10 days of the upgrade installation. After that, you can not do anything to uninstall it. If you want to uninstall it during this ten-day period, go to Settings> Update & Security> Recovery. In the "Go back to the previous version of Windows 10" section, click the "Get started" button, and then follow the instructions.
Even if you want to uninstall an upgrade within 10 days, you may not see the "Go back to the previous version of Windows 10" option. If this happens, you will not be able to uninstall the update. The likely cause of the problem is that your Windows.old folder has been deleted. This folder contains the previous version of Windows, and if there is no folder, you can not go back to the previous version.
To uninstall other updates, on the View Update History page, click Uninstall Updates. You will see a list of your Windows updates - although you will not see everything. Not all the updates listed in "View installed update history" will appear on a list that allows you to uninstall updates, and you can not uninstall anyone that is not in this list. When you press some updates on the update removal screen, the uninstall button disappears. Double-click the update that you want to resolve. The screen will appear asking if you want to uninstall it. Press the Yes button.
In some cases, you may be able to ensure that Windows 10 does not reinstall the update that you uninstall. Use one free Microsoft tool to actually hide from Windows Update. To do this, go to this support page for Microsoft (https://support.microsoft.com/en-us/help/3183922/how-to-temporarily-prevent-a-windows-update-from-reinstalling- in-windo), move the content to the bottom and click the link "Download the 'Show or hide updates' troubleshooter package now.' Install download, click Next and follow the instructions to hide updates for which you do not want to reinstall them.

2. Get rid of Cortana
They do not admire all Cortana, Microsoft's sometimes inadvertent digital assistant. Before updating the Anniversary Update for Windows 10 in August 2016, this did not have to be a problem, because it was easy to turn off Cortana. It was enough to open Cortana, select Settings, look for the "Cortana can give you suggestions, ideas, reminders, alerts and more" tips and move the slider to Off. But updating Anniversary Update has removed this option.
Still, you can still turn off Cortana. If you use any version of Windows 10 other than the Home version, you can do this using the Group Policy Editor. Start the Group Policy Editor by typing gpedit.msc in the search box. Then go to Computer Configuration> Administrative Templates> Windows Components> Search> Allow Cortana. Set it to "disabled".
If you use Windows 10 Home Edition, you'll need to get down to Windows Registry. As always, when you are changing Registry, be careful when editing - if you change the wrong parameter, you can cause great damage to your operating system. It's also a good idea to create a System Restore Point before changing Registry, so you can restore your system to the state it was in before it entered the changes.
With these reminders, here's how to kill Cortana through the Registry:
- Type regedit in the Search box, and then press Enter to start the Registry Editor.
- Look for the key HKEY_LOCAL_MACHINE \ SOFTWARE \ Policies \ Microsoft \ Windows \ Windows Search. If you do not have this key on your system, you will have to create it. To do this, right-click the Windows folder, and then select New> Key. A new key will be automatically generated with the default name, such as New Key # 1. Call Windows Search by simply typing the new key name. If for some reason the key's name is not highlighted and the cursor is not in it, right-click it, select Rename, and enter the name of the key you want.
- Right-click the Windows Search Key, and then select New> DWORD (32-bit) Value.
- Call the AllowCortan value.
- Double-click AllowCortan and set its value to 0.
- Close the Registry Editor. Log out and log in again, or run your PC again to make the change take effect.
To reboot Cortana, delete the AllowCortana value or set it to 1.
Keep in mind that you still have a business if you have disabled Cortana to protect your privacy by preventing Cortana from collecting information about you. This is because the information Cortana has already collected about you is still in the cloud. If you want to delete some part or all, here's what to do:
Go to the Cortana Notebook section at Microsoft's Privacy Control Panel. You will see various personal content, from finance to flights, news, sports and more. Press any type of content, and then follow the instructions for deleting. If you want to delete all the information Cortana collected about you, click on "Clear Cortana data" on the right side of the screen.
:max_bytes(150000):strip_icc()/windows-10-14328-580797c43df78cbc285096a1.png)
3. Correct the problems with the Start menu
When it was first announced that Windows 10 would restore the Start menu, many users welcomed it. But after Windows 10 was released, some people began to complain about problems with the Start menu - it did not start when the Start button was pressed, or frozen, or random items appeared or disappeared. If you have problems with the Start menu, do not be afraid; There are several ways to try to fix it.
Note: Before attempting any of these techniques, first restart your computer. Sometimes, just restarting fixes things.
Check the updates
There is a possibility that the problem can be resolved by a Windows update - Microsoft continuously resolves errors with its updates. To make sure you have all the latest Windows updates, go to Settings> Updates & security> Windows Update and select "Check for updates". If some find it, install them. You may need to restart your computer to make the update come into effect.
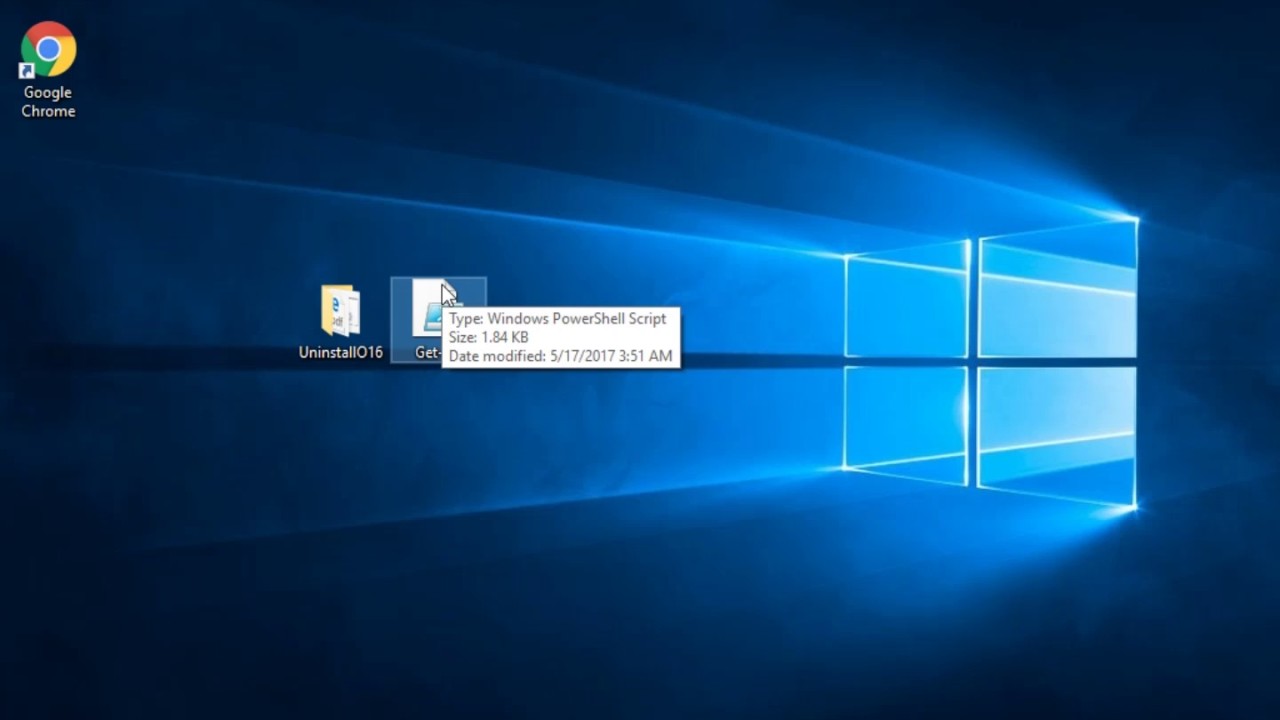
Repair damaged files using PowerShell
If there are still problems in the Start menu, it may be damaged files. You can find and repair them using a command line tool named PowerShell that is embedded in Windows:
Type powershell in the Windows search box, in the search results, right-click the Windows PowerShell, and then select the "Run as administrator" option. This will run PowerShell.
If for some reason the search box does not work, press the Windows + R key on the keyboard, type PowerShell and press Enter. It runs PowerShell, but not the administrator account you need to use. To do this, take a few more steps: right-click the PowerShell icon in the taskbar and select "Pin to taskbar". Then close PowerShell. Now right-click on the PowerShell icon in the taskbar and select "Run as administrator".
After you run PowerShell as an administrator, type sfc/scannow and press Enter. PowerShell will scan your system for corrupt files. This may take some time.
When PowerShell finishes scanning your system, it will tell you whether it has found and corrected corrupt files, found corrupt files, but could not fix them, or failed to find corrupt files. If he found corrupt files but could not fix them, type the dism/online/cleanup-image/restorehealth command and press Enter. That should solve the problem.
Create a new local administrator account or reset your computer
If none of this helps, Microsoft has this latest tip: create a local administrator account, so if the Start menu in this account works, move all of your files and settings to it; or reset your computer with recovery options for Windows 10.

4. Return the lost storage space
Windows 10 can be cumbersome for disk space, especially if you upgraded it from an earlier version of Windows, or after a major update to Windows 10. This is because when you upgrade or install major updates, Windows 10 saves the old version of the operating system, for The case is that you want to return to it.
But this older version of the operating system takes up a few gigabytes of storage space. If you have a computer with plenty of storage space, do not worry. But if your storage is tight, it can be a serious problem.
For example, I have a laptop HP Stream with 32GB of storage space, and when I tried to upgrade to the latest version of Windows 10, I could not do it - my old version for Windows took up so much space that the new version of Windows could not be installed.
If you are certain that you will not want to return to the old version of Windows, you can easily delete it. It is stored in a folder called Windows.old that you find in the folder / Windows. However, instead of manually erasing it, use the Disk Cleanup tool:
- Start the tool by inserting Disk Cleanup into the search line and pressing the result of the Disk Cleanup that appears. The tool takes a few minutes to search your system.
- When Disk Cleanup finishes, view the list of files you can clear and check the box next to "Previous Windows installation (s)". This entry only occurs if you have some previous installation of Windows on your hard drive.
- Press OK.
The old version of Windows will be deleted, and you will recover your disk space.

5. Speed up Windows startup
From the moment Windows 10 was released, people began complaining that their launch time was slower than previous versions of Windows. If you are annoying the lethargic start of Windows 10, there are two ways to speed it up:
Enable Fast Startup
Windows 10 has a feature called Fast Startup, which combines normal shutdown with Windows hibernation.
With a fast start-up, when you shut down your computer, it closes your applications and logs of all users but loads the Windows kernel and drivers into a disk-based hibernation file. Then, when you restart your computer, Windows loads the kernel and drivers from the hibernation file, which speeds up the startup process.
Quick startup may already be enabled on your computer. Here's how to check if it is and what to do about it if it is not:
- Right-click the Start button, and then select Power Options from the menu that appears.
- Press "Additional power settings."
- Select "Choose what the Power buttons do."
- Look at the screen that appears in the "Shutdown settings" section. If the option "Turn on fast startup (recommended)" is confirmed, "you do not need to do anything else.
- If the option is not confirmed, press "Change Settings that are currently unavailable".
- Confirm the option "Turn on fast startup (recommended)" and press Save changes.
That's all it takes. Keep in mind that on some machines, the fast startup is not enabled. If this is the case with your machine, there will be no "Turn on fast startup (recommended)".
Speed up the launch using Task Manager
Windows 10 Task Manager is a great tool for managing computer startup. With it, you can disable programs that run on startup:
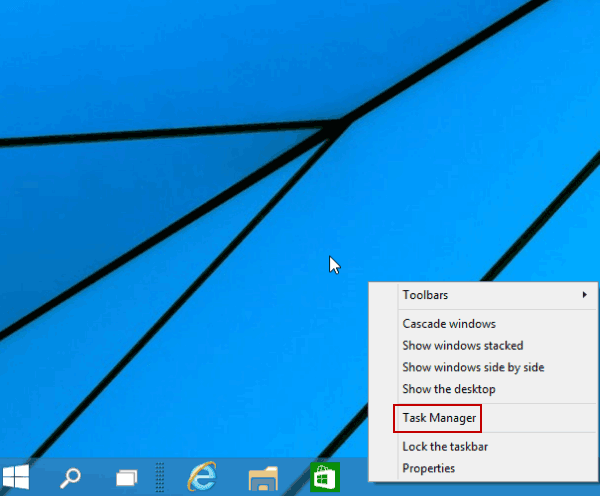
- Right-click the job line, and select Task Manager.
- If the Task Manager is executed as a small window and only displays the applications currently running on your system, click on the link "More details" at the bottom of the screen. An expanded view will open, with more tabs at the top of the screen.
- Click the Startup tab. It lists all applications that are executed when starting the system.
- Right-click any application you do not want when starting the system and select Disable. You will still be able to run these programs by running them in the usual way - they will not be executed when the system is started.
Some additional tips: To help you decide which programs to disable, see the "Startup impact" column. It shows whether the program has no impact on the start time, low impact, medium impact, or high impact.
Many programs on the list may not be familiar to you and you will not be sure whether to disable them or not. Right-click one that you do not recognize and select "Search online". This will launch an online search for the filename. Review the results; it will usually tell you exactly what the program is doing, and it will be easier for you to decide whether to leave it running while the system is running.
You can also right-click on any program on the list and select "Open file location". This will open Windows Explorer to the folder where the .exe file is located. This is another key for the purpose of the program and for deciding whether to disable it when starting the system.

6. Turn off annoying notifications
The Windows 10 Action Center sends you notifications about your email, social media, software updates, system messages, and more. It can be useful or terribly boring, depending on your personality and how much information you receive.
However, there's an easy way to turn off notifications for one application or stop them all by one go:
- Go to Settings> System> Notifications & actions.
- To turn off all notifications, move to the Off button that is located directly below Notifications & actions.
- If you want to keep certain notifications and let them do not, do not move the slider to Off. Instead, go to the "Get Notifications from these senders" section, then move to the Off sliders next to applications and services from which you do not want to receive notifications.
Share the News